One common theme that I've noticed among Blender tutorials and the Gamekit book is that character animation takes a long time. The Gamekit devotes about 20 pages to describing how to rig an armature (bone structure) to a human model, and then use keyframe animation to create a walk cycle by moving the bones into the necessary positions. Other tutorials follow this model, but usually begin by devoting a whole "Phase One" wherein they explain first how to create the actual human model. The whole process can take a few hours to walk through.
In my eternal quest to achieve a quicker flash-to-bang ratio, I came up with a new idea: reduce the time needed to create an animated, walking human, by creating something other than a human.
Meet Slimey Sam
Slimey Sam is a Gelatinous Cube monster (go dig out your Dungeons & Dragons book for reference). As such, he has a much simpler body to model, and an extremely simple, 2-bone armature. Blender even gets you part-way there by giving you his cube body. So let's get started:
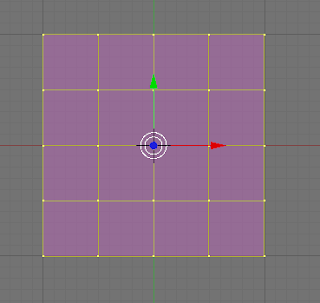
First, either start Blender, or create a new file if Blender is already running. You'll see that the default view adds a Cube object at the X,Y,Z origin point, and it's selected. Press the Z key to switch to Wireframe view, to make it easier to see the vertices of the cube. Press the Tab key to switch to Edit mode. Zoom in on the cube a bit, and then press the W key to pop up a menu of transformations, and select Subdivide (you can press 1 as a shortcut key). Do it a second time to add even more vertices.

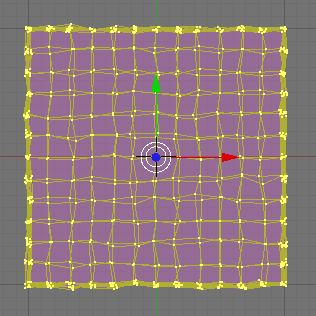
Now you'll want to subdivide a third time, but here I like to use the Fractal subdivide, that moves the vertices around a bit to make the form a little more interesting, instead of keeping it a perfect cube. Press W and pick the Subdivide Multi Fractal (3) option. The default options for Number of Cuts = 2, and Rand Fac = 10 works pretty well. Now you have:

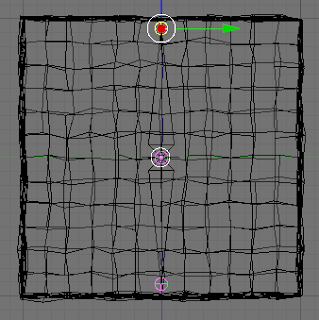
Zoom way in on the mis-shapen cube, press the Tab key to switch to Object mode, then the Numpad 3 key to switch to Side View, then press the Space key, and pick Add, Armature. The new Armature becomes selected with one bone, going from the center of the cube up to the top-center. Press Tab again to switch back to Edit mode. Click the bottom base point of the bone to select it, then press the E key to extrude a new bone from it. Press the Z key to restrict the mouse to the Z-axis, then move the mouse down until it's just above the bottom of the cube, to keep the bone inside. Then click the top point of the top bone to select it, press the G key to grab and move it, then press the Z key, and move the mouse down until it's just below the top of the cube, to keep the tip of the bone inside.

Now press Tab to switch back to Object mode. Press the A key to de-select everything. Right-click the cube, then hold shift and right-click the bones to add them to the selection. Press Control-P to pop up the Make Parent To menu, and choose the Armature option. Then on the Create Vertex Groups menu, choose Create From Bone Heat. This pairs up each vertex to its closest bone, and makes the vertices deform and follow the bones as they move.
Now, middle-click the border between the 3D view and the top menu, and choose the Split Area menu option. Move the mouse about halfway across the screen and click to split the screen vertically. In the right window, click the Window Type selector and choose Action Editor. The right window changes into a timeline view. In the left 3D window, press A to de-select all, then right-click the bones to select the Armature. In the right Action Editor, click the empty Up/Down arrow to the right of the Action Editor selector and choose Add New. Enter the name "Slide" in the box after the "AC:" text label. This will be the name of the action.
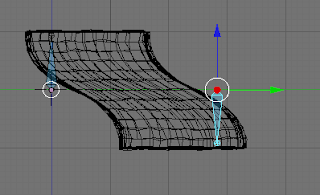
Back in the 3D window, press Control-Tab to enter Pose Mode. Press A to select all (both) bones. Now press the I key, and select the Rot menu option. Now right-click just the bottom bone to select it, press I and select the Loc option. This captures the Rotation of both bones, and the Location of the bottom bone, for this first keyframe. Now press the Up arrow key 3 times to advance to frame 31. Press the G key to move the bone, then the Y key to restrict movement to the Y (left-right in this Side view) axis, then move it to the right so that the bottom of the cube is stretched out like this:

Press the I key, and choose Loc to add a Location marker to this new keyframe. If you press Shift-Left arrow key to go back to frame 1, then Alt-A, it'll play the animation so far. Press Esc to stop playing. Now to make the bottom slide back into the resting position, move the mouse over the Action Editor window, press the B key to enter bound-select mode, and draw a box around the two keyframe dots for the bones in frame 1. Now click the button with the arrow pointing down into the orange line, which copies the keyframe to the buffer. Now press the Up arrow key six times to get to frame 61, then click the button with the arrow pointing up out of the orange line, to paste from the buffer. The 3D window should change from the slide position back to the resting position. You can press Shift-Left arrow to go back to frame 1, and Alt-A to play again. Now you'll see the cube slide to the right, then back to the left.
Middle-click the line separating the two windows way over to the right, and select Join Areas, then move to the right and click. This will get rid of the Action window now that you're done editing. In the button panel at the bottom, click the Pac-Man Logic Panel button (F4). Press Control-Tab to switch back to Object mode. The whole Armature should be selected. Add a Keyboard sensor that responds to the Right Arrow key, then add a controller, then two actuators: Motion, and Action. The Motion should be Simple Motion, with a 0.01 in the Loc: Y column. The action type should be Loop End, the AC: should be Slide, End on frame 61. Connect the keyboard sensor to the controller, and the controller to the two actuators. Click the Actor button so that the cube will become the "Player" object in your game. Mouse over the 3D window, and press the P key to start the game engine. Hold down the right arrow key to slide the cube to the right.
So as you can see, going from a static object that you can move around the screen, to one that has the appearance of animated movement, is pretty simple in Blender. And you didn't need to spend hours modeling a complicated humanoid and rigging its bones, in order to just see the necessary steps. The fully-rendered animation of the cube's walk cycle looks something like this:


